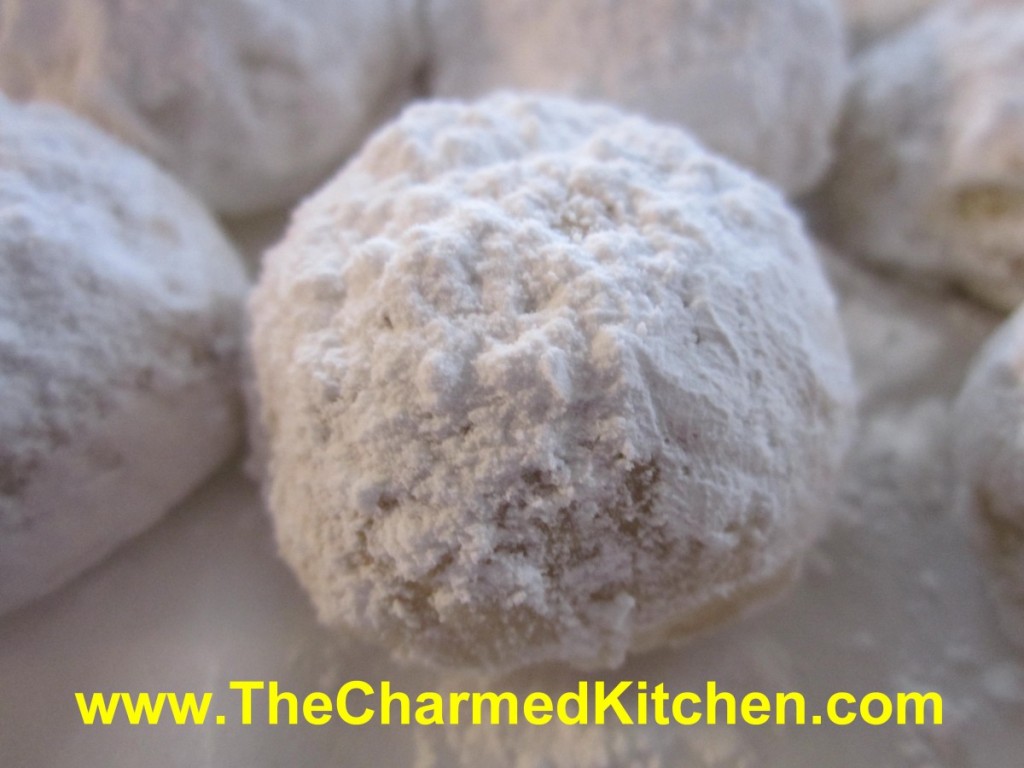
Russian Teacakes

This is the first cookie I can remember making with my Mother. She sat me down at the kitchen table with a pile of chilled dough. I think I was 7. She put a piece of wax paper on the table, then rolled out one small ball of dough. She told me to do what she had just done. Roll out the rest of the dough into little balls. I sat there and made one tiny dough ball after another, until I was done. I can’t make these cookies without thinking of her. A special memory, indeed. Wouldn’t seem like Christmas without them.
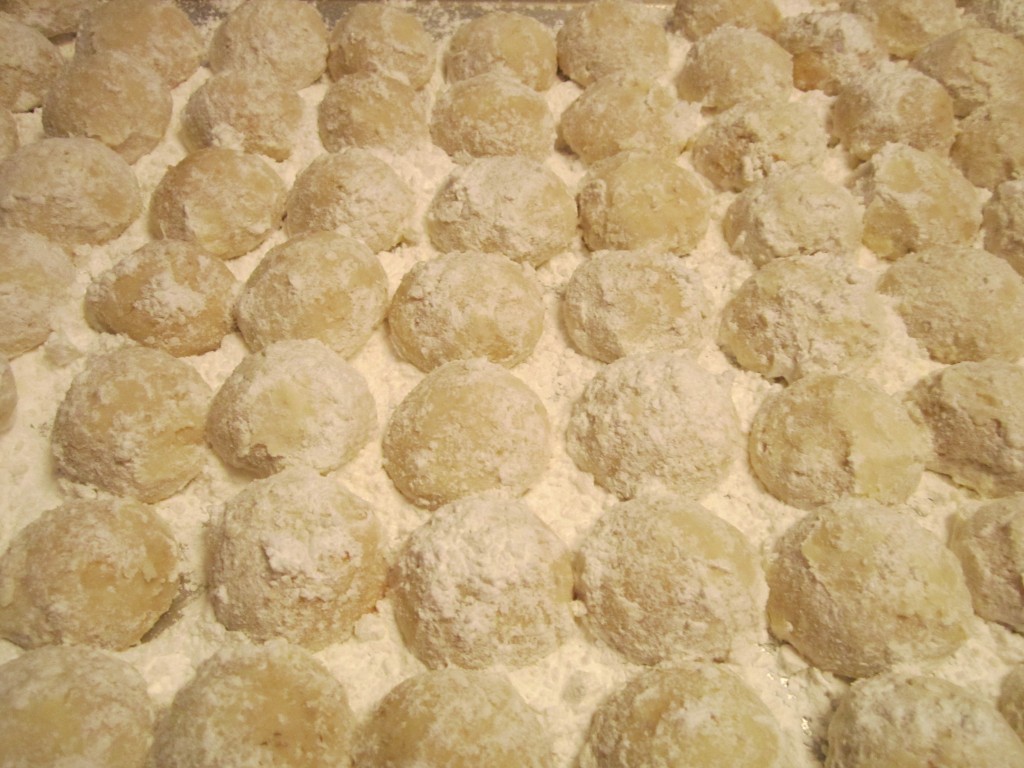
Russian Teacakes, also known as Mexican Wedding Cakes are a delicate nut-filled shortbread cookie coated in powdered sugar. The magic is created when the cookies, hot from the oven, are rolled in powdered sugar. The powdered sugar clings to the hot cookies and makes a sort of sweet coating. Once cooled, they are dusted with more powdered sugar. Whether you call them Russian Teacakes, Mexican Wedding Cakes, or as another friend always refers to them, butter balls, these cookies are a must for your holiday cookie baking.
Russian Teacakes
1 c. butter
½ c. powdered sugar, plus extra for coating
1 t. vanilla
2 ¼ c. flour
¼ t. salt
¾ c. finely chopped nuts, nearly ground
Mix butter, ½ cup sugar and vanilla well. Stir flour and salt together and then add to butter mixture. Mix well and stir in nuts. Wrap dough and chill. Heat oven to 375 degrees. Roll dough into 1-inch balls and place 1 inch apart on ungreased baking sheet. Bake 10-12 minutes. Cookies should be lightly browned on the bottom. While still warm, roll cookies in powdered sugar. Dust again with sugar once cooled. Makes about 4 dozen.
Sugar Cookies with Non-Royal Icing


These cut-out cookies are a classic, and always part of my holiday cookie baking. I will confess to having an enormous assortment of cookie cutters, so there is almost no end to the shapes I might use. This time of year I am making trees, stars, snowmen and more.
These cookies are crisp and sturdy enough to stand up to frosting, without being too hard. They also hold their shape well when baking.
I normally use royal icing to frost them, and an assortment of sprinkles and other candies. Royal icing is made with egg whites or powdered egg whites. The advantage over a butter cream, is that royal icing hardens, making the cookies easy to pack and stack. You don’t need much- just a thin layer. Tinting the frosting different colors is a big part of the fun. Depending on how much time you have, you can get really creative with decorating.
I tried a different frosting last year. Several friends had said they didn’t have, or couldn’t find, powdered egg whites and wondered if there was an alternative. There is. This one has just a few easy to find ingredients, and hardens up as nicely as royal icing, with a bit of a shine. The recipes for both icings follow the recipe for the cookies.
Sugar Cookies
1 c. butter
1 c. sugar
1 egg
1 t. vanilla
3 c. flour
2 t. baking powder
3 T. milk
Extra sugar for sprinkling, if desired
Beat butter and sugar until fluffy. Beat in egg and vanilla. Combine dry ingredients and add to butter mixture. Beat in milk. Heat oven to 375-degrees. Roll dough on lightly floured surface to about 1/3- inch thickness. Cut out with lightly floured cutters and sprinkle with sugar or colored sugar if you like and if you are not going to frost them. Bake on an ungreased baking sheet for 10-12 minutes. Cool on baking sheet 3 minutes before placing on wire rack to cool completely. Frost when cooled. Makes about 4 dozen.
Decorating your cookies:
You can use a buttercream frosting, if you like, however the topping I prefer is royal icing. Because royal icing contains egg whites it gets hard. Cookies have a smooth appearance and can be stacked. When making royal icing, use pasteurized egg whites or powdered egg whites. Raw egg whites pose a risk of salmonella.
You can also use colored sugar and sprinkles and mini chocolate chips for eyes.
Non-Royal Icing
4 c. powdered sugar
3 T. corn syrup
2 t. vanilla extract
1/3 c. lemon juice- about
Combine the first three ingredients then add the lemon juice, a little at a time until the icing gets to the consistency you want. You might need a little more. Stir until smooth and add food coloring, if you like. Spread or pipe out, allowing to dry before adding new layers of icing.
Traditional Royal Icing
1 lb. powdered sugar
½ t. cream of tartar
5¼ t. egg white powder
6 T. water
½ t. vanilla, optional
Assorted food coloring
In large mixing bowl combine dry ingredients and mix well. Add water and vanilla and beat until light and fluffy, about 10 minutes. Divide into small bowls and tint each batch as needed. Keep bowl covered with a damp towel while waiting to use so frosting will not dry out.
Homemade Mustard

I love making food gifts for the holidays. I often make cookies or other baked goods. But not everyone wants sweets. For those friends and family, I often make them homemade mustard. I have included recipes for 5 of my favorite mustards.
I wasn’t a big fan of mustard, when I was a kid. I am now. I enjoy using all types of mustard in all sorts of dishes, not just on hot dogs.
Mustard is great on sandwiches and sausages. It is a versatile ingredient for salads, salad dressings, marinades and sauces. I lean towards spicy brown mustard myself.
I also enjoy making my own mustard. That way, I can tweak the seasonings.
So here are five of my favorite homemade mustard recipes. If you never made mustard before- you might want to try. It is easy, and fun. Four of them are stored in the fridge- and will keep for months. For gift-giving, look for decorative jars or crocks to put them in. The fifth recipe is canned, so 4 ounce canning jars are required, but it doesn’t have to be stored in the fridge until after the jar is opened.
Horseradish Mustard
1 c. dry mustard
3/4 c. white wine vinegar
1/3 c. dry white wine or dry sherry
1/4 c. brown sugar
1/4 c. granulated sugar
1 T. dried minced onion
2 t. caraway seeds
1 1/2 t. salt
1/4 t. coarse ground mustard
2 eggs, slightly beaten
1 T. prepared horseradish
Combine all ingredients, except eggs and horseradish in top of double boiler and let stand at room temperature for 2 hours. Whisk in eggs and cook over simmering water until mixture has thickened and eggs are cooked, about 10 minutes. Remove from heat and stir in horseradish. Pour into sterilized jar, cool and cover. Store in fridge for up to 3 months. Makes 2 cups.
Bavarian Mustard
3/4 c. beer
2/3 c. dry mustard
2 T. sugar
2 T. cider vinegar
2 t. salt
1-t. celery seeds
1/2 t. fresh grated ginger or 1/4 t. dry
1 egg, beaten
Combine all but the egg in the top of a double boiler and let stand 2 hours at room temperature. Stir in egg and cook over simmering water. stirring constantly until mixture thickens and egg is cooked, about 10 minutes. Pour into sterilized jars and cool before covering. Store in fridge for up to 2 months. Makes 2 cups.
Spicy Mustard
1 c. dry mustard
2/3 c. dry white wine
1/2 c. vinegar, flavored with herbs or garlic
1/2 c. sugar
2 t. salt
1 t. basil
1 t. chili powder
1 t. dried minced garlic
1 t. oregano
1/2 t. cracked pepper
2 eggs, slightly beaten
Mix all ingredients, except eggs, in top of double boiler and let stand 2 hours at room temperature. Add eggs and cook over simmering water, stirring constantly until mixture thickens and eggs are cooked, about 10 minutes. Pour into sterilized jars and cool down before covering and refrigerating. Keeps in fridge for up to 2-3 months. Makes 2 cups.
French Herb Mustard
1/4 c. dry mustard
1/4 c. white wine vinegar
1/4 c. white wine or dry sherry
1/4 c. brown sugar
1/2 t. salt
1/2 t. tarragon
1/4 t. dill seed
1/4 t. celery seed
1/4 t. ground cloves
3 egg yolks or 1 whole egg
Combine all ingredients, except eggs, in top of double boiler and let stand at room temperature 2 hours. Whisk in eggs and cook over simmering water, stirring constantly, until mustard thickens and eggs are cooked, about 5 minutes. Store in crock or jar in fridge for up to 1 month. Makes 1 cup, recipe can be doubled.
This recipe can be canned, so it doesn’t have to be kept in the fridge. A bit of work , but worth the effort. Makes about 6, (4 ounce) jars.
Dijon Mustard
2 cups chopped onion
2 cups Pinot Grigio or other dry white wine
1 cup white wine vinegar (5% acidity)
1 tsp. salt
6 garlic cloves, coarsely chopped
4 black peppercorns
1 rosemary sprig
1 cup yellow mustard seeds
1⁄3 cup dry mustard
2 2⁄3 cups water
Combine first 7 ingredients in a large stainless steel or enameled saucepan. Bring to a boil over high heat; reduce heat, and simmer, uncovered, 15 to 20 minutes or until onion is very soft, stirring occasionally. Remove pan from heat; pour onion mixture through a wire-mesh strainer into a glass or stainless steel bowl. Discard solids. Stir mustard seeds and dry mustard into wine mixture. Cover and let stand at room temperature at least 24 hours, but no longer than 48 hours. Process mustard mixture in a blender or food processor, adding water until consistency of cooked oatmeal. Transfer mustard to a small saucepan. Bring to a boil, stirring often; reduce heat, and simmer, uncovered 5 minutes. Ladle hot mustard into a hot jar, leaving 1⁄4-inch headspace. Remove air bubbles. Wipe jar rim. Center lid on jar. Apply band and adjust to fingertip-tight. Place jar in boiling- water canner. Repeat until all jars are filled. Process jars 10 minutes, adjusting for altitude. Turn off heat; remove lid, and let jars stand 5 minutes. Remove jars and let cool.
Source Ball Book
Lavender Vanilla Shortbread

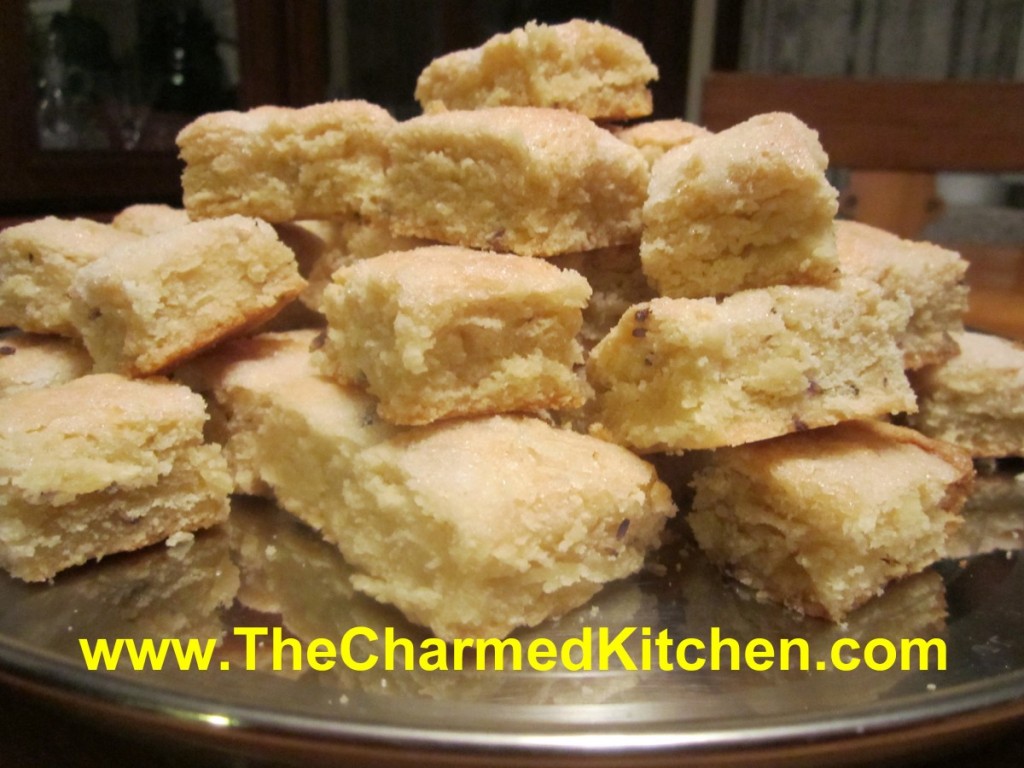
I really enjoy cooking with lavender. It goes well in savory dishes, but also in desserts and sweets. Seemed only natural to add some lavender to shortbread. It is one of my go-to recipes. This time I added some vanilla sugar, too. The combination of lavender and vanilla is one of my favorites. The slightly spicy flavor of the lavender blossoms pairs well with the sweeter, sort of floral flavor of the vanilla. If you don’t have vanilla sugar (directions follow), you can add 2 teaspoons of vanilla to the dough.
Lavender Vanilla Shortbread
1 c. vanilla sugar, plus extra for sprinkling*
2 c. butter
4 c. flour
2-3 T. lavender blossoms
Cream together the one-cup of sugar and butter. Stir in the flour and lavender blossoms. Press mixture in to a greased 9×13 inch-baking dish. Cut or score into small squares, or on the diagonal for diamond shapes. Sprinkle with extra sugar and bake in a preheated 300-degree oven for 50-55 minutes or until lightly browned around the edges. Re-cut the squares as soon as you remove the shortbread from the oven. Cool before removing from pan. Make about 100 small squares.
* If you don’t have vanilla sugar just use granulated sugar and add 2 teaspoons of vanilla extract to the dough.
Making Vanilla Sugar
Some specialty stores sell vanilla sugar and it is expensive. I find it easy to just make my own. Vanilla sugar can be used in baking or to top desserts, in tea, and other drinks. I love to sprinkle vanilla sugar on sugar cookies and on muffins, too.
I buy vanilla beans by the pound online and use them in cooking and to make my own vanilla extract.
To make vanilla sugar just cut vanilla beans in half lengthwise and then into 1 inch pieces. Place granulated sugar in a jar and add the vanilla beans. Cover jar and shake once in awhile. The sugar is fragrant in about a week but will get stronger the longer it sits. I use one vanilla bean per cup of sugar. You can add more sugar to the jar as you use it. The beans will continue to flavor new sugar added to the jar for some time.
Holiday Bath Salts

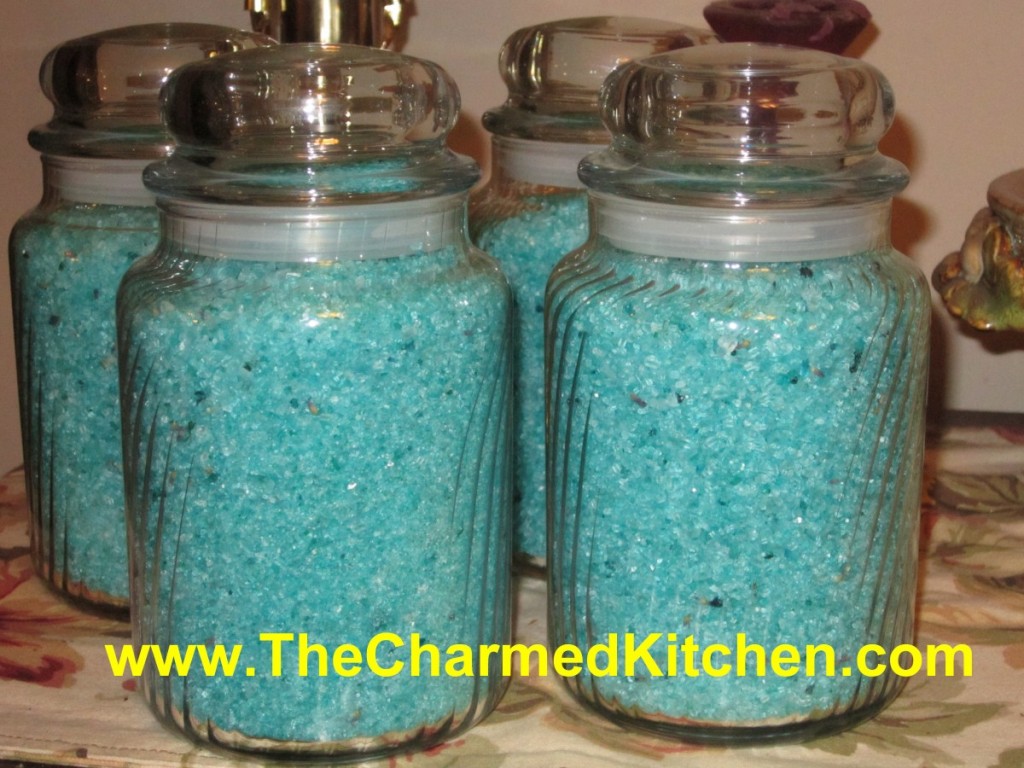
If you are looking for a simple and easy gift to make for someone, you might want to make bath salts. It is one of my favorite gifts to make. Everyone seems to like them. This is a fun craft for kids to make for Mom, teachers etc. I like using essential oils, but you can use perfume, too. You can also leave them unscented, if someone is sensitive to perfumes and fragrances.
The ingredients are fairly easy to find. Epsom salts can be found at any drug store. Essential oils can be found at most craft stores. Food coloring- grocery stores. Try to find pretty jars to put them and finish with a pretty label.
Homemade Bath Salts
Epsom Salts
Fragrant oils or extracts
Food coloring, optional
Place 2 cups Epsom salts in a non-reactive bowl and add a few drops of scented oils and a few drops of food coloring, if desired. Toss to distribute, or place in a jar with a tight fitting lid or even in a plastic bag and shake mixture well. Take a whiff. If you can’t smell them, add more. You can add more coloring, too if needed. Place salts in a glass jar with a lid or in a plastic bag and let stand a day or two. Smell again and adjust fragrance as needed. Fragrances mature and you may find them too weak or strong. Add more oil or cologne to heighten aroma or add more salts to cut down on intensity. Keep in mind that the bath salts will be diluted a lot in a bath, so a little strong is good.
The oils are available at many craft stores and by mail. See the section on mail order in the back of the book. Choosing the fragrance you want to use can be a little trickier. Most of the florals are a safe bet, but you may want to get more creative. Citrus, herb, spice and woody fragrant oils can add a dimension to your bath salts that make them really outstanding. Food extracts and flavors can also be used. Vanilla is nice, but think outside the box a little and try anise or almond.
To present them as a gift salts can be put in a wide-mouth jar, with a lid. Decorate with ribbon and attach a small scoop, if you like. Discount and dollar stores are a good place to find attractive jars at a reasonable price as well as garage sales and resale shops. You can also package them for individual use in lollipop bags with a card board header. I like to make different fragrances and label them (relaxing bath, earthly delights, sweet dreams, etc. I then package them in the bags and add a few to a gift basket.
Cookies and Biscotti for Sale

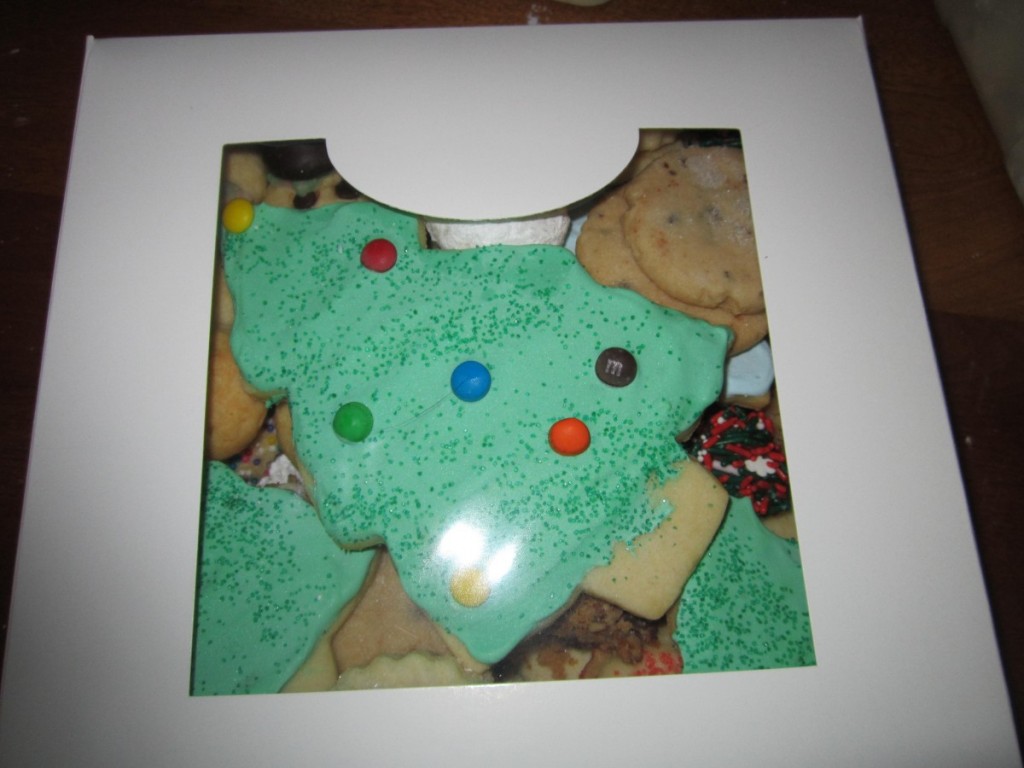
I will be selling boxes of cookies again this year. The boxes are about 2 pounds and contain at least 10 kinds of cookies. Contact me if you are interested. They are $25 each and will be available for pick-up starting December 20th.
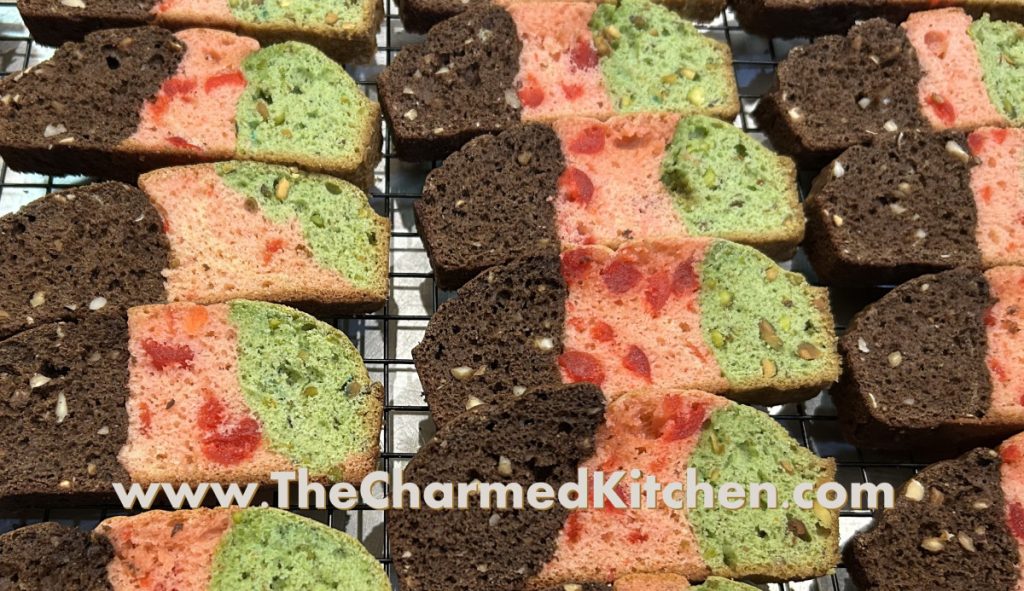
New this year I will also be selling biscotti. You can order spumoni biscotti, a trio of Holiday flavors or a trio of nutty flavors. Biscotti are $10 for12.
Special Offer!!!!! If you buy 2 or more boxes of cookies, you get 6 biscotti for free!
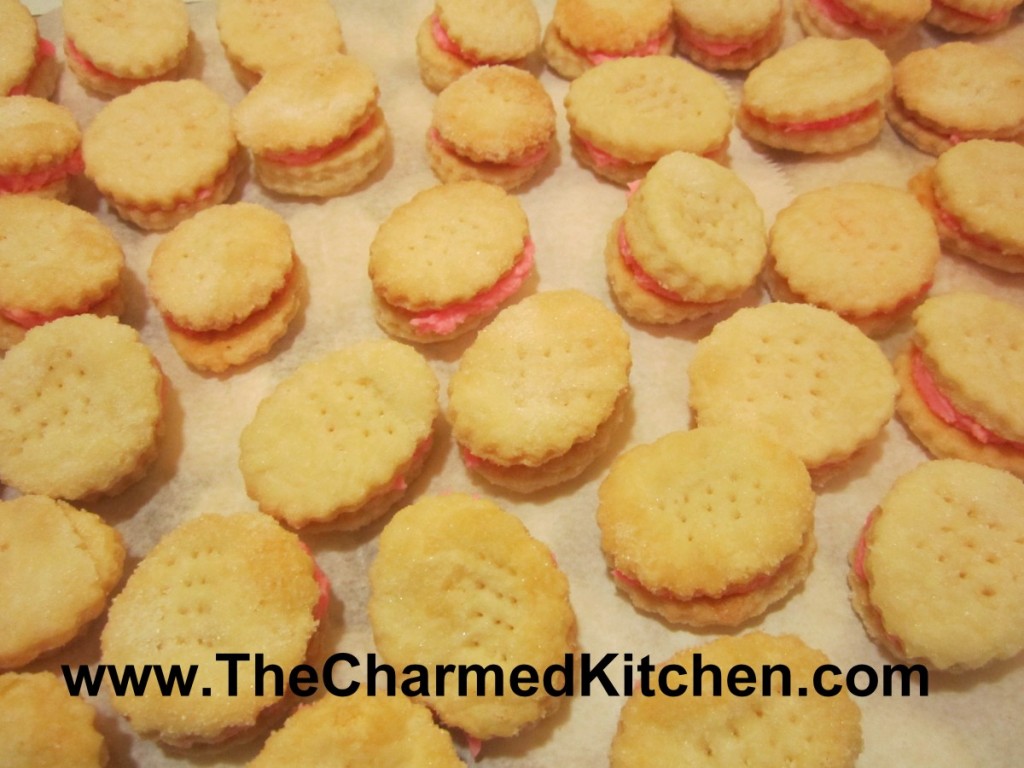
I will also be selling boxes of cream wafer cookies. They are my most popular cookie and for the first time you can order boxes of just cream wafers. They will be available in boxes of 25 cookies for $25. There will be limited amounts of these available, so get your orders in early.
Please call or email me with your orders soon.
Judi_strauss@att.net
216 501 2905
Christmas Tree Coffee Cake

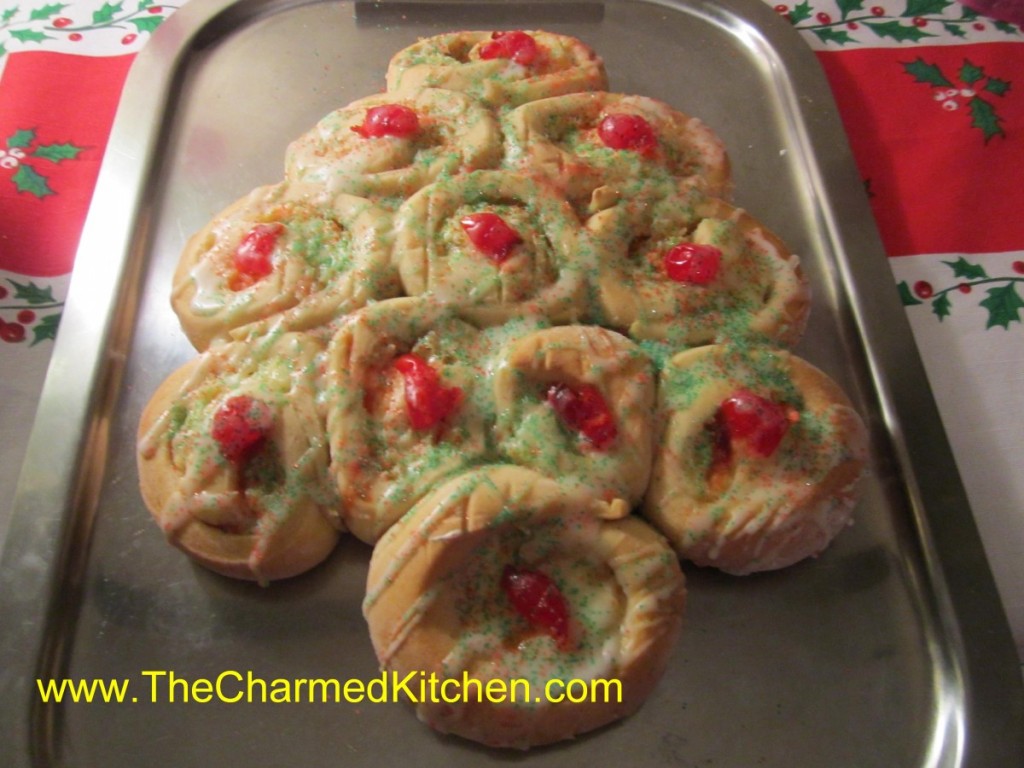
This Christmas “tree” has become a tradition around here. I make one as a gift for a dear friend every year. If you are looking for something to serve for Christmas morning, or even as a dessert option, I suggest you make this coffee cake.
The recipe actually makes 2 “trees,” so you can have one to give- and one to keep. Or perhaps, one for Christmas Eve and one for Christmas Day.
The yeast dough is prepared, then chilled before rolling. You can do that a day, or even two days, ahead of time. The rolls are filled with a pineapple and cream cheese mixture and are very tasty.
The rolls are arranged in a tree pattern before baking. Then, after baking, the “tree” is topped with a light glaze and gently sprinkled with red and green sugars. The original recipe called for candied cherries. You can use them, or Maraschino cherries or even dried cherries or cranberries. I can my own spiced cherries and sometimes use them. So pretty, and not that hard to make.
Here is the recipe.
Christmas Tree Coffee Cake
Dough:
4-4 1/2 c. bread flour
1/2 c. sugar
1 1/2 t. salt
2 packages active dry yeast
3/4 c. milk
1/2 c. water
1/2 c. butter
1 egg
Filling:
1 lb. Cream cheese, softened
1/2 c. sugar
1/4 t. nutmeg
dash salt
1/4 t. vanilla
1 (20 oz.) can pineapple in its own juice drained and squeezed dry
Topping:
11 Maraschino cherries, halved
2 c. powdered sugar
3 T. milk
red and green sugars
For dough in large mixing bowl combine 2 cups of the flour with the sugar, salt and yeast. Heat together the milk, water and butter until very warm. Add to flour mixture and beat 2 minutes. Add egg and 1 more cup of flour and beat 2 more minutes. Stir in enough of the remaining dough to make a stiff batter, about 1 cup. Cover bowl tightly with foil or plastic wrap and refrigerate for at least 2 hours or up to 3 days before using. For filling combine all ingredients for the filling except the pineapple and beat until smooth. Stir in pineapple and set aside until ready to use. Remove dough from fridge cut in half. Roll out one piece on lightly floured surface into a 10×11- inch rectangle. Spread with half the filling, leaving an inch at the end of 11-inch side. Roll up from eleven- inch side. Use thread or dental floss to cut through dough in 1-inch pieces by placing thread under roll and crossing ends. Pull outward and thread should cut through dough. If you aren’t having any luck you can always use a knife, but they tend to flatten the rolls. On a greased baking sheet arrange the slices (you should have 11) into a tree shape. Start with one on the top and then a row of 2 below then 3 and then 4. The last roll will serve as the trunk. Cover dough with plastic wrap and set in a warm place to rise. Repeat with the remaining dough and filling. When dough is risen, about 1-2 hours bake in a 375- degree oven for 15 minutes then cover edges with foil to prevent over browning and return to oven for 10 minutes more. Cool on wire rack. Place half a cherry in the middle of each roll. Make a glaze with powdered sugar and milk and drizzle over. Sprinkle with the sugars. Makes 2 trees, 11 rolls each. Can be frozen up to a month ahead . Defrost in a 350 -degree oven for 10 minutes and apply toppings.
Cheese Puffs

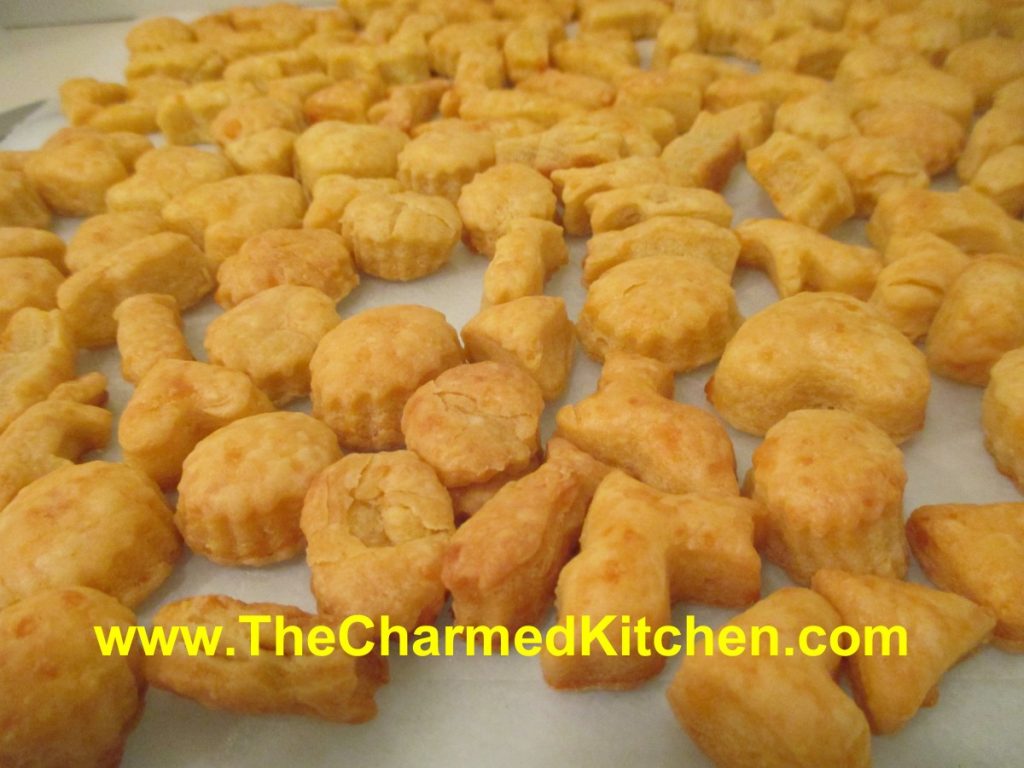
Forget any of the store-bought “cheesy” crackers you have had in the past. These are so much better. The dough is pretty simple, with just 5 ingredients- cheese, butter, salt, cayenne or hot sauce and flour.
Homemade crackers are not hard to make at all. They do involve a little time, but it is well worth it.
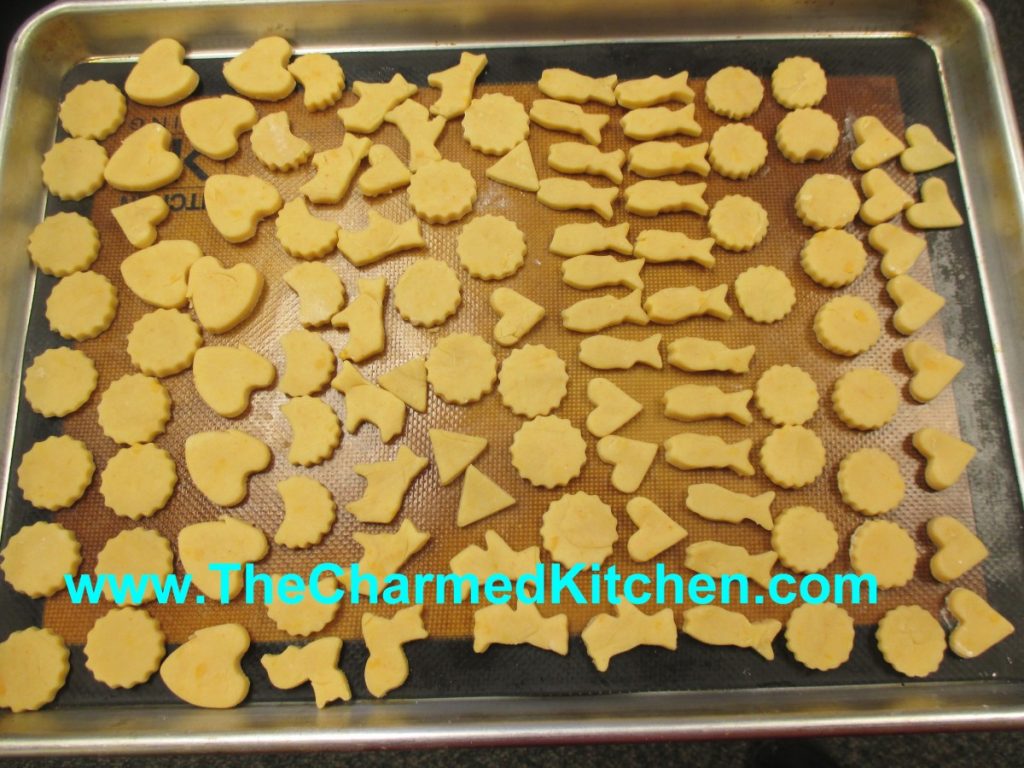
We used miniature cookie cutters (also called aspic cutters) that come in all sorts of adorable shapes. You can also just cut the dough into thin strips, or small squares. We even cut some in little fish shapes, like a popular cheesy snack cracker.
I used sharp cheddar cheese, but you can play around with other cheeses. I have made these with Swiss cheese and they were also good. You can add more cayenne or add some herbs, if you like. I really recommend using a food processor to make the dough. It helps to get the cheese and flour to combine.
They don’t spread at all, so you can place them pretty close together on the baking sheet.
Think of how much fun these would be to serve at your next party. They make a nice gift, too.
Cheese Puffs
1 lb. sharp cheddar cheese, grated
½ c. butter
½ t. salt
¼ t. cayenne pepper or hot pepper sauce to taste, I use hot sauce
1¾ c. flour
In mixer or food processor, combine cheese and butter until smooth. Add remaining ingredients and blend until pretty smooth. Roll out onto lightly floured surface to 1/4-inch thickness. Cut into thin strips or use mini cookie cutters to make shapes. Place on ungreased baking sheet, nearly touching, as they do not spread. Bake in a preheated 350 degree oven for 15-20 minutes. Bottoms should be lightly browned. Makes about 100, freeze well.
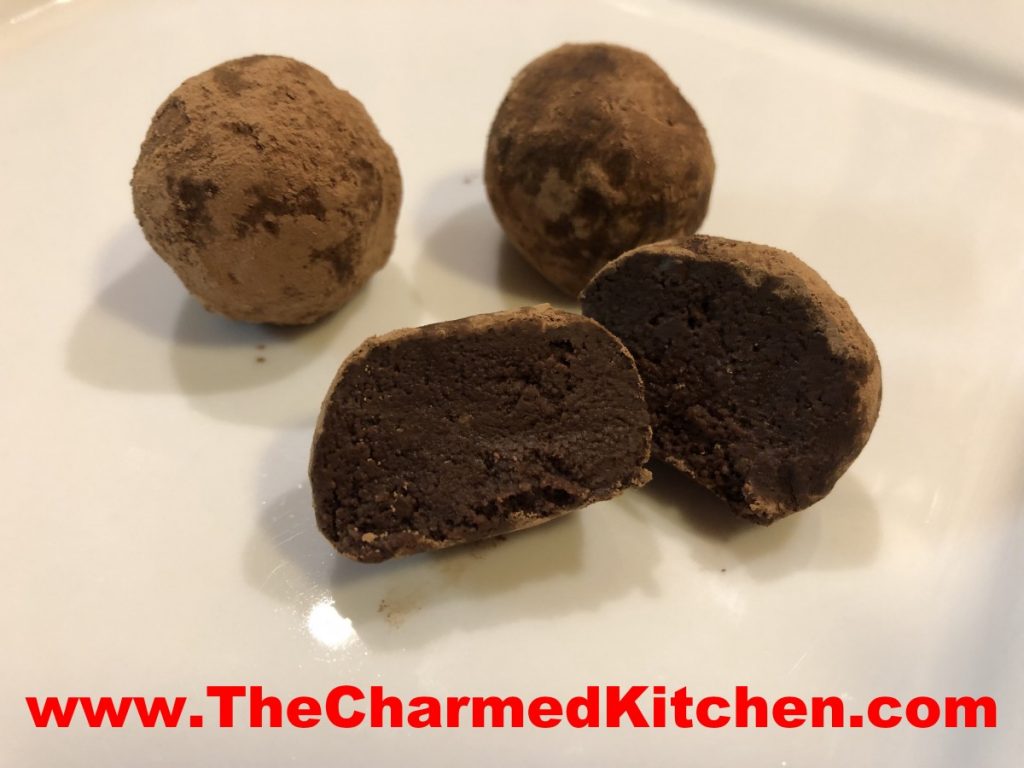
Homemade Chocolate Truffles

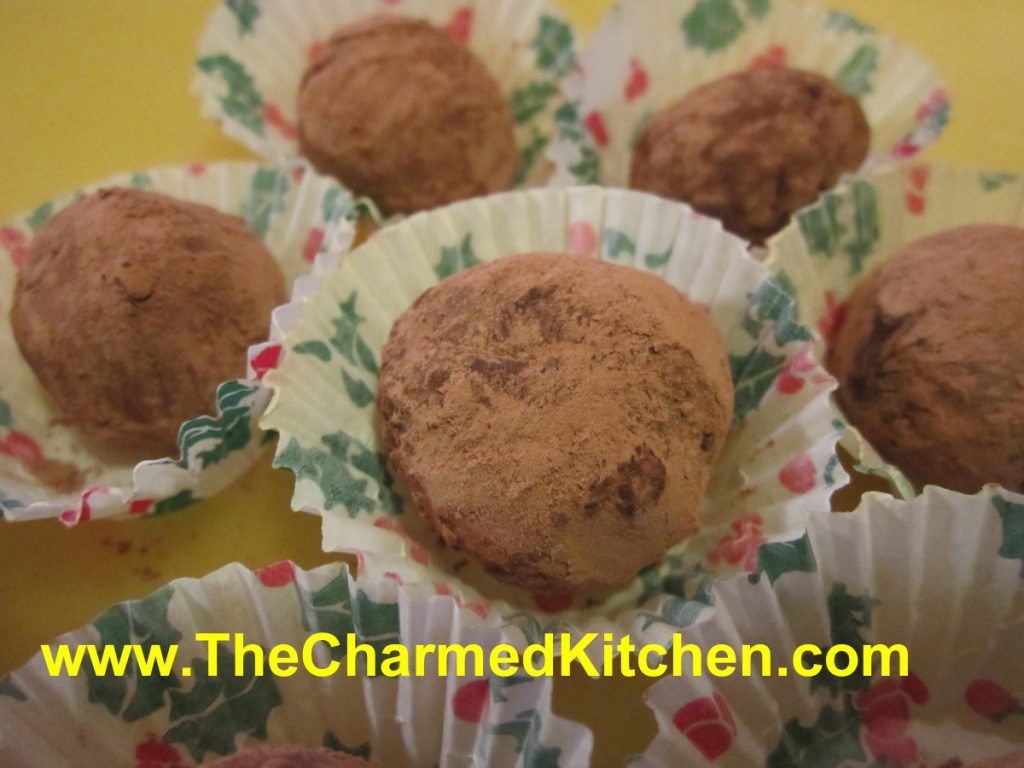
In keeping with my homemade gift theme this week, I wanted to share this simple, yet very tasty recipe, for Chocolate Truffles. These melt in your mouth, with a smooth, creamy texture and rich, chocolate flavor.
They can be a lovely hostess gift. Kids can make them, too.
The secret for making really good truffles is using the best quality chocolate you can. You can use chocolate chips, but get good quality chips.
They are very soft, and melt quickly when handled. When rolling them out, I prefer to wear plastic gloves. Make them without gloves, and you will understand why.
At candy making stores, you can get small papers cups and small boxes or tins for wrapping up your truffles.
Chocolate Truffles
1/3 c. Whipping cream
6 T. butter, cut into small pieces
12 oz. dark chocolate, grated or chopped coarsely, you can use semi sweet chocolate chips
Unsweetened cocoa
Heat cream to boiling in small saucepan. Stir in butter and cook until melted. Remove from heat and stir in chocolate until melted. Place in shallow bowl and chill until firm, at least a couple of hours. Roll mixture into 1-inch balls and roll in cocoa. Sometimes the mixture is quite firm and hard to roll into perfectly smooth balls. You can roll them out as smooth as you can, roll in cocoa and then roll again to smooth out. You might want to give them another roll in the cocoa after that. Makes about 30.
Homemade Hot Cocoa Mix

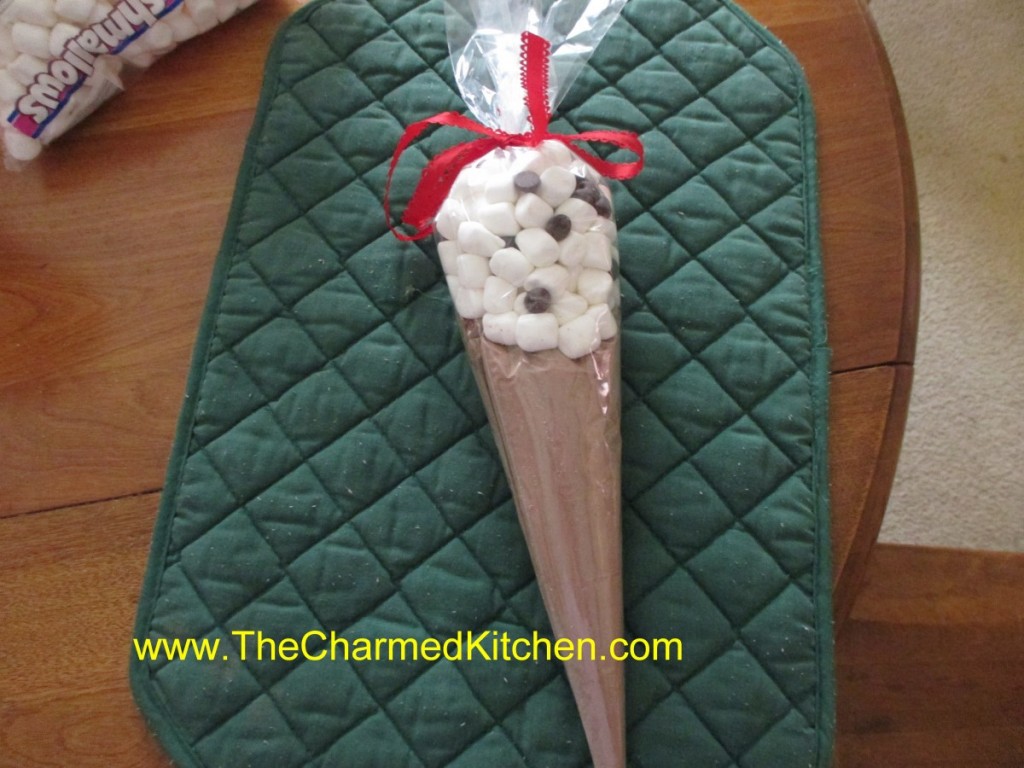
I am always looking for homemade gift ideas for the holidays. I really like gifts that both adults and kids can make. This one is just a simple way to package homemade hot cocoa mix to make it special.
You start with hot cocoa mix- recipe follows. Then you get these cone-shaped bags. I use a 12-inch size and a 17-inch size. I buy my online, but they are available in some craft and candy making stores. Put about 1 cup of the hot cocoa mix in the smaller cone-shaped bag. Fold the top down and tape it shut. Now place the smaller bag inside the larger bag. Top with about a cup of mini marshmallows mixed with some chocolate chips. The chips are optional. Tie shut with a ribbon. It ends up looking (sort of) like an ice cream cone. I add a label that says “Hot Cocoa for Two” with directions that say, “Divide hot cocoa mix between two large mugs. Fill with a cup of boiling water in each. Stir and top with the marshmallows”. You can make whatever label you like. A quick and simple gift. You could also include mugs with the gift. This is a great idea for kids to make for grandparents, teachers, etc.
Here is the recipe for the hot cocoa mix.
Hot Cocoa Mix
3 c. dry milk – you can use non fat, but I prefer dried whole milk – I get it online
1 c. cocoa
1 c. sugar
1/4 t. salt
1 c. mini marshmallows (optional)
In large bowl, mix all ingredients well. I like to sift the ingredients in because it powders the milk even finer than the way it comes. Store in an airtight jar and use within 6 months. To use add 5 tablespoonfuls to 8 ounces boiling water. Variation, flavor with cinnamon, instant coffee, cayenne pepper or even dried orange peel.


